Introduction
Have you ever pondered over the seamless handling and transmission of bulky files by individuals and organisations? The secret behind this efficiency lies within the realm of zip files. Picture a zip file as a versatile envelope that can neatly contain your disorganized documents. Not only does it serve as a vessel, but it also automatically compresses its contents, ensuring a snug fit into any storage space. This compression drastically minimizes file size, facilitating effortless sharing across diverse networks. Fun fact: A compressed file belongs to the archive file format family. Employing compression algorithms, it boasts numerous advantages, including enhanced data security, simplified sharing, and reduced storage demands. In this article, we’ll walk you through the process of installing the zip and unzip utility. Furthermore, a dedicated section outlines steps for unzipping a ZIP File in Ubuntu Linux. Let’s delve in!
Install the Zip and Unzip Utility in Ubuntu
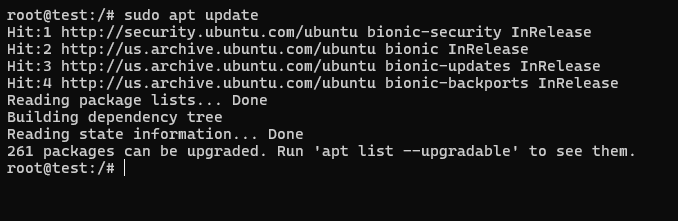
Before downloading the utility, it’s strongly advised to acquaint yourself briefly with its functionalities. This command-line tool excels in both compressing and decompressing files and directories effortlessly, while adeptly handling multiple files concurrently. Armed with this basic understanding of the zip and unzip utility, let’s proceed to the download steps. Following this, we’ll delve into the process of unzipping a ZIP File in Ubuntu Linux. To initiate, open the terminal window by pressing Ctrl+Alt+T. Ensure you have an updated package before downloading the utility. Simply execute the command provided below.
sudo apt update
- After the package is updated, enter the below command to install the utility.
sudo apt install zip
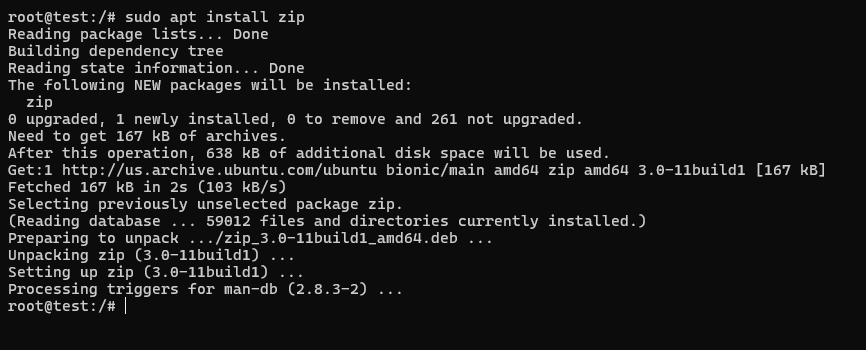
- Once you have installed the utility, simply enter the user account password and press enter.
- Your zip utility is installed now; we will install the unzip utility using the code below.
sudo apt install unzip
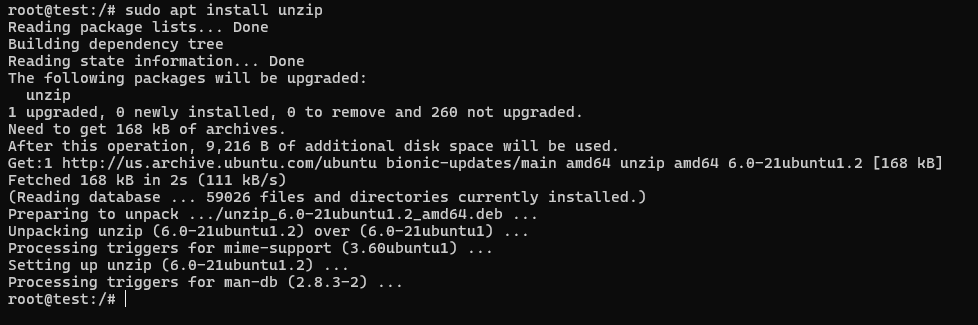
- Again enter the user account password and press enter.
- The installation is complete, and you just have to verify the installation by creating a zip file.
- Use the below code to create and unzip a .zip file in Linux.
zip test.zip test.txt

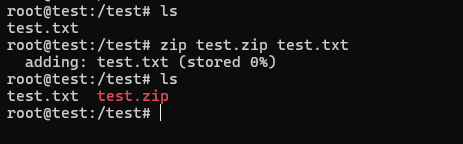
# Unzip the test.zip file
unzip test.zip
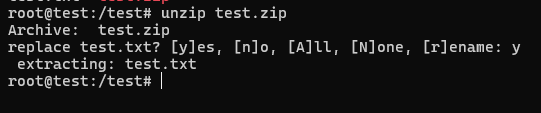
Once you have successfully executed the unzip commands in Linux, you can confirm that the process has been completed.
Unzip a File Using the Command Line
The process of unzipping a .zip file in Linux is as easy as zipping it. Follow these steps to learn the unzipping process quickly.
- Press Ctrl+Alt+T to open the terminal window.
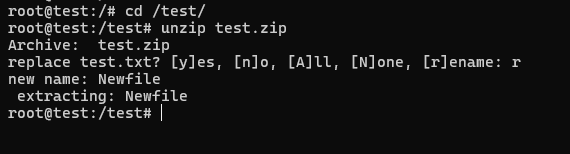
- Now you need the correct path of the zip file to proceed further. Use the below command to navigate the zip file in the terminal window.
cd ~/Downloads
- Replace the’`/downloads’ with the correct path of your zip file.
- Once the navigation is done properly, simply enter the below command to unzip a .zip file in Linux.
cunzip example.zip
- The final step is verifying the unzipping process by personally visiting the directory where the extraction process occurred.
Other Linux Unzip Commands
1. How to Unzip Multiple ZIP Files?
The above utility, which we have just downloaded through a terminal window, is capable enough to unzip multiple files. All you have to do is open the terminal window through Ctrl+Alt+T and navigate the zip files through the command ‘cd ~/Downloads.’ Make sure to replace the ‘~/downloads’ with the actual path of your zip files. Now you just have to invoke the terminal window loop through the code below.
for zip_file in *.zip; do unzip "$zip_file"; done
This command will start a process where all the zip files of the current directory will be unzipped swiftly.
2. How to Test if a ZIP File is Valid
To test if a ZIP file is valid and not corrupted, you can use the “unzip” command with the “-t” option. This option allows you to test the integrity of the ZIP file without actually extracting its contents. Here’s how you can do it:
- Open a terminal window in Linux.
- Navigate to the directory where the ZIP file is located using the “cd” command. For example, if the ZIP file is in the “Downloads” folder, use the following command:
The “unzip” command will check the ZIP file’s integrity and display the result. If the ZIP file is valid and not corrupted, it will show a message indicating that the test was successful. On the other hand, if the ZIP file is corrupt or invalid, it will show an error message indicating the issue.
Conclusion
This guide will walk you through installing the zip and unzip utility on Ubuntu Linux, along with utilizing the command line to unzip .zip files. The zip utility compresses files and directories, whereas unzip extracts contents from zip files. Linux users frequently rely on unzipping files to efficiently handle substantial data volumes and streamline information sharing across networks. With the zip and unzip utilities at your disposal, managing archives and extracting their contents becomes a seamless and uncomplicated endeavour.